

With the arrival of spring and warmer temperatures, the first step to utilizing the yard is to tap the maple trees and make some maple syrup. I’ve made maple syrup a few times in the past decade, but like most people in Eastern Canada and the northeastern US, I was introduced to maple syrup as a child and not just on my pancakes and French toast. One of the rights of passage as a Canadian child is going to a “sugar bush” where you get to see the process of making syrup. It is like a crack house for Canadians, and once you taste real, fresh, maple syrup, you are hooked for life.
Making maple syrup is not a complicated process, though it does require some equipment, physical energy and time, lots of time. For your effort, you will be well rewarded.
The first step is to tap the trees. For this, you will need spiles, buckets, lids, cone filters and some large containers (5-gallon buckets work) to hold the sap. These can all be purchased at hardware stores in January and February. Sometimes you can get a kit that has everything. The cone filters are used to filter the bark, bugs and squirrels out of the sap buckets before you boil it.
Sap starts to flow when the daytime temperatures rise above freezing (0°C/32°F) and drop below freezing at night. This cycle is important.
How much sap do you need to make maple syrup?
The best trees are sugar maples as they have higher sugar content in the sap, though any maple tree will produce usable sap. You can tap birch trees as well, but the syrup has a different flavour. It takes about 160L (43 gallons) of sugar maple sap to make 4L (1 gallon) of syrup. The average maple tree can produce 25 to 75L (6.5 gals to 20 gals) of sap per tap. Huge trees can handle 3 taps, but smaller trees should only have one. Tapping a maple tree does not harm it, and many trees have been tapped for 100+ years, crossing multiple family generations.
There are many ways to boil sap, some people use propane burners, others do it over a wood fire in a cast iron pot, and the professionals use fuel oil burners. Propane (21,500 BTU/lb) can be expensive, wood is okay (7,000 BTU/lb), but you still have to chop the wood, and fuel oil works well (19,000 BTU/lb) if you are doing commercial production. Boiling sap on the stovetop is not something you want to do, it puts way too much moisture into an enclosed space. I like to think outside the box and come up with my own solution.
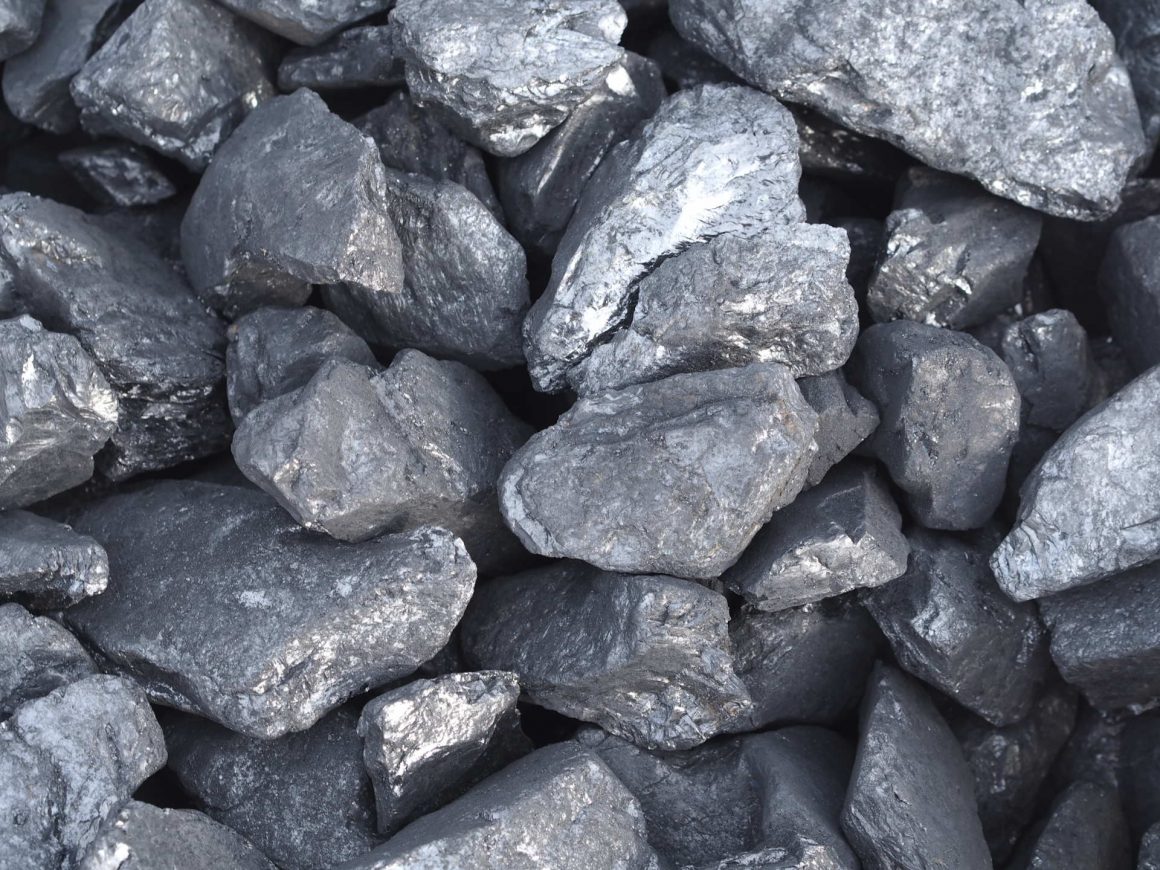
My choice of fuel is anthracite coal (hard coal) that produces 12,700 BTU per pound. The coal comes in 40lb bags (508,000 BTU per bag) for $8.00 ($0.20 per lb) making it a cheap, energy-dense and relatively environmentally friendly fuel. Yes, it is, when compared to other fuels but making maple syrup is not an ecologically friendly process.
Anthracite coal is not like lignite or bituminous coal, which is used by the energy and mining sectors and gives coal a bad name. Anthracite has ultra-low sulphur content and is roughly 95% pure carbon, and that is what we want. When it burns, there is very little ash and almost no smoke. Anthracite is not suitable for power generation or smelting because it is too expensive on a large scale, but it is perfect for making maple syrup.
The reason we want an energy-dense fuel for boiling is that it will take a long time to boil the sap. Coal burns at a relatively constant rate, and for a long time, whereas wood starts off hot and then decreases in intensity fairly rapidly, meaning you will frequently have to feed the fire with wood.
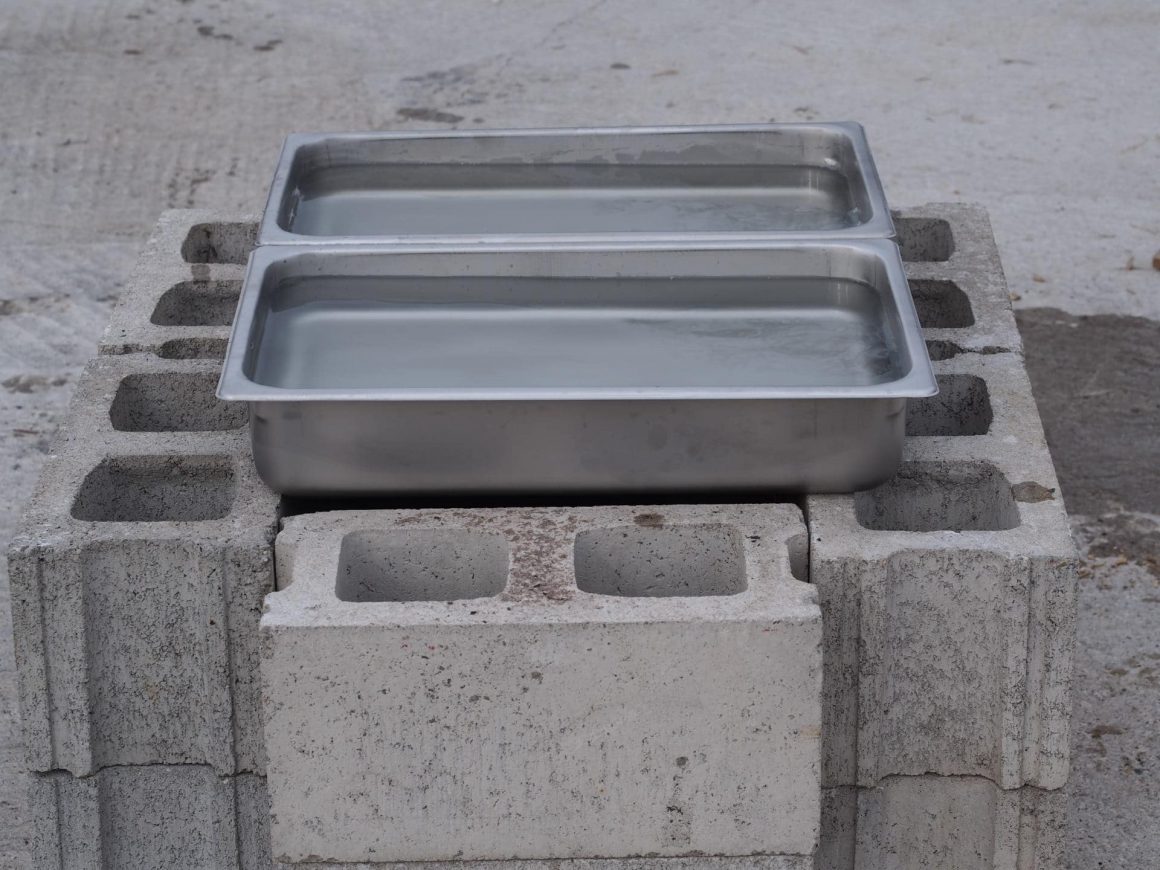
There are many ways to build a “boiler,” and my method is relatively simple and anyone can duplicate it. The only thing you need is 12 cinder blocks, some 1/4 inch hardware cloth (wire mesh), two 4 inch deep steam table pans (21″ x 12.5″) and optionally 12 regular bricks. The equipment can be purchased for less than 100 dollars and can be used for many years.
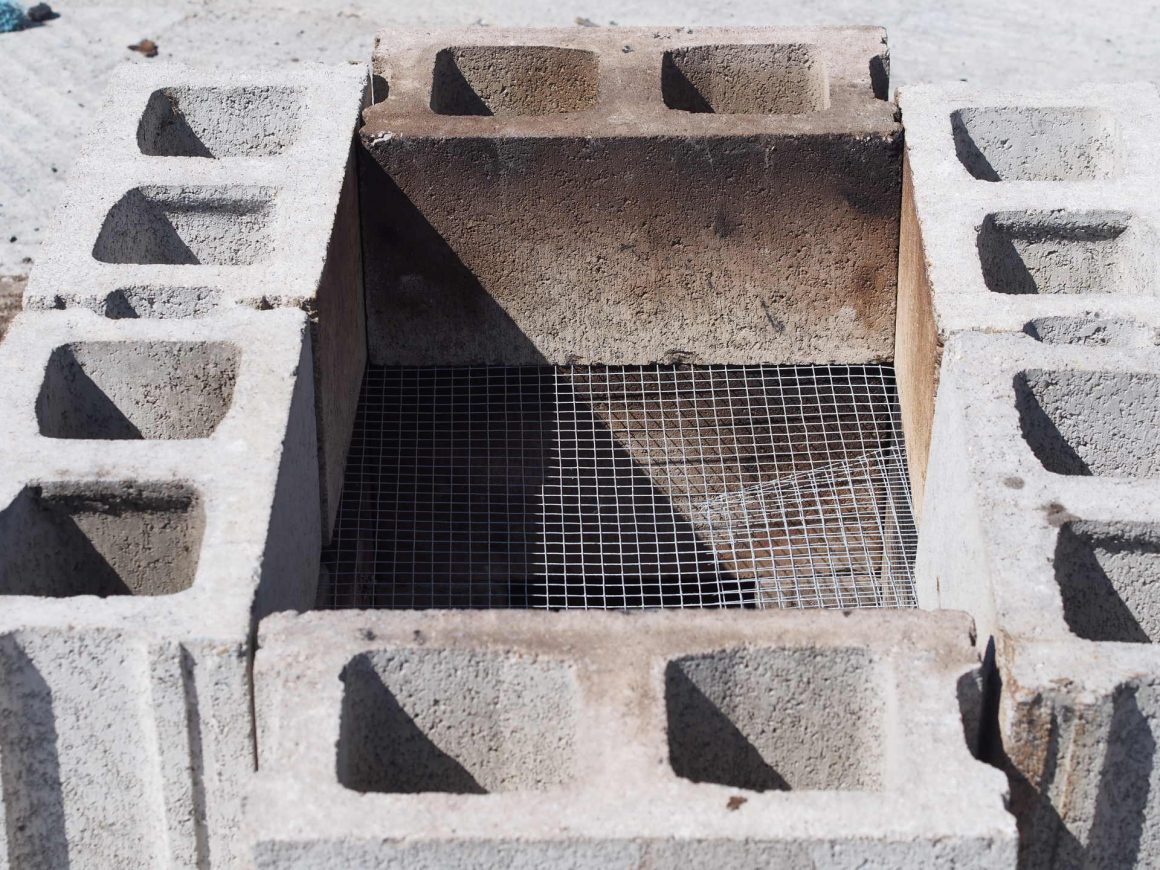
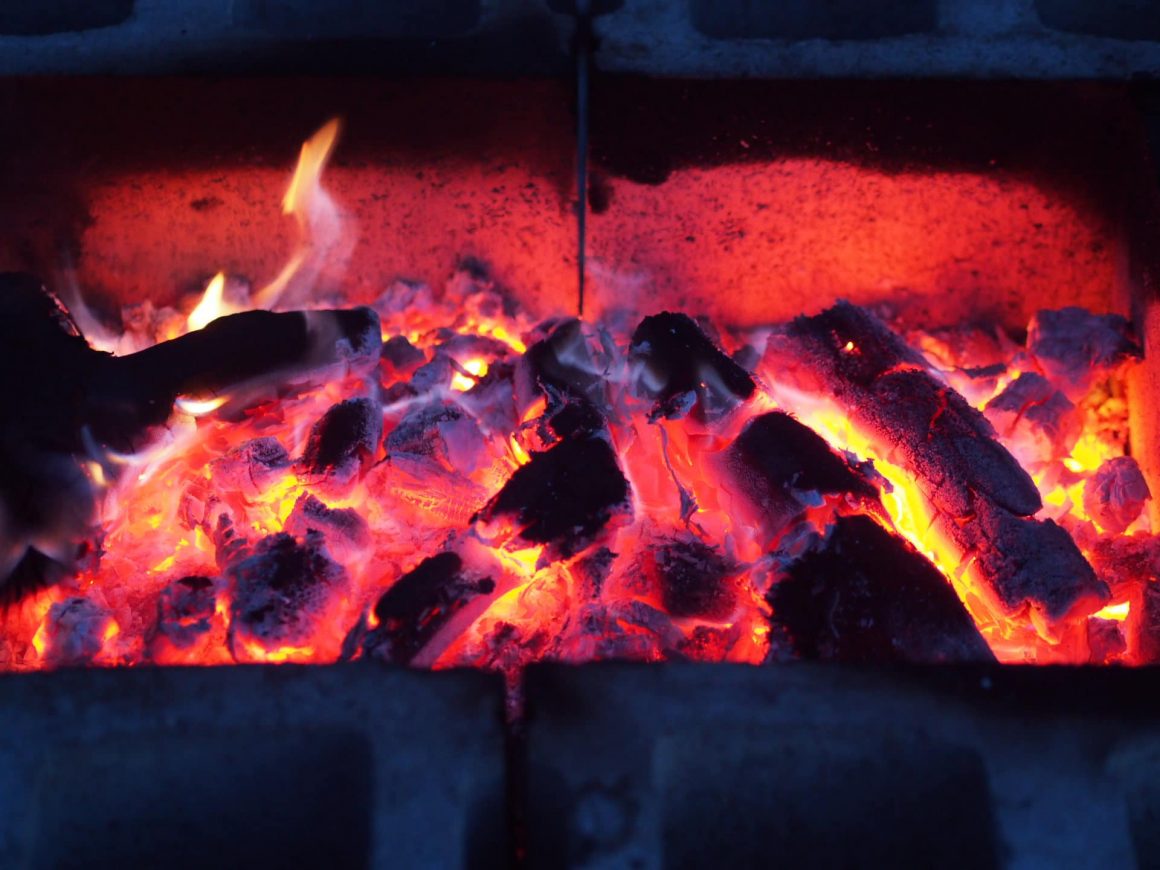
The trick to getting hard coal to burn is building a thick coal bed with lots of air flow through the bed. To do this, you just take the cinder blocks and stack them two high with the hardware cloth between the first and second cinderblock layers, and voila, a perfect environment to burn coal. I use the standard bricks to stack the first layer of cinder blocks on, producing a gap that lets air flow in. You can just flip a couple cinder blocks, so they have the holes facing outward, allowing air to flow into the coal bed.
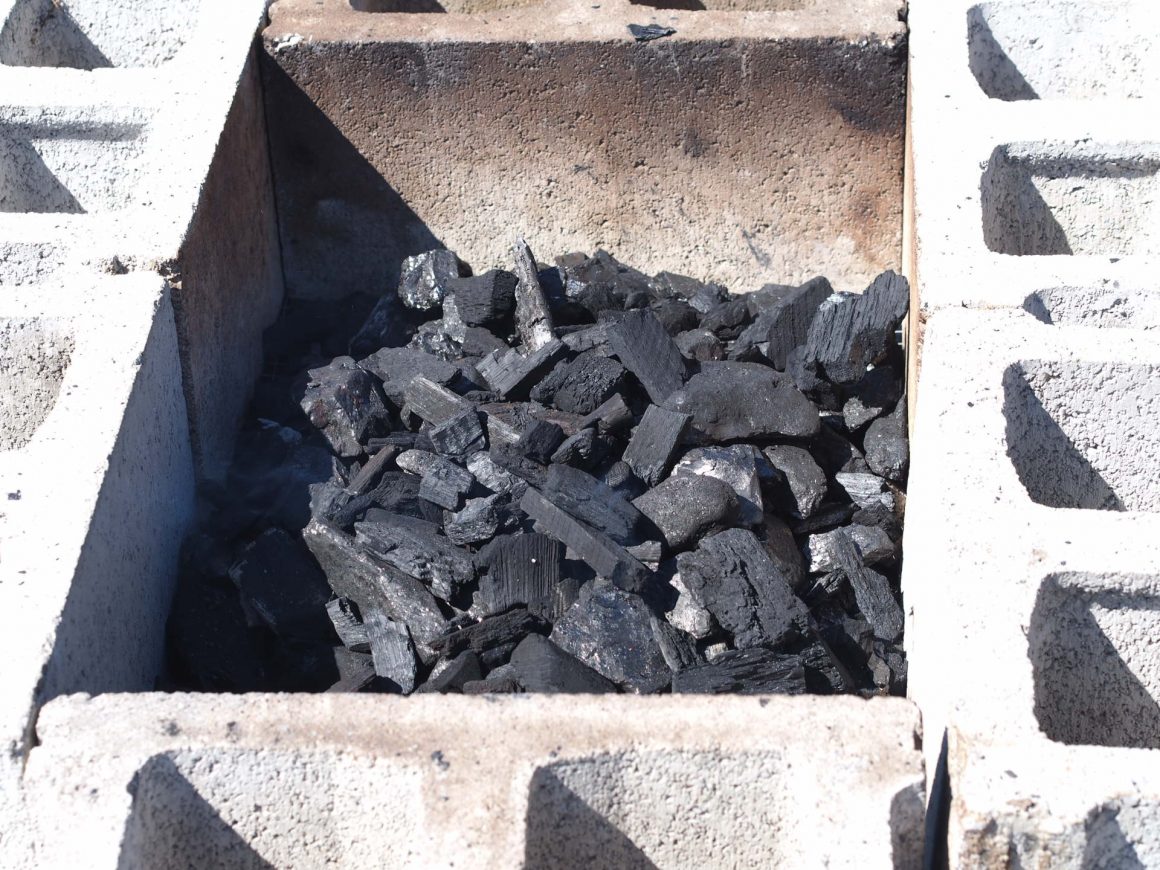
Anthracite coal requires high heat to ignite it, and my solution is to mix the anthracite with charcoal, the stuff you use to barbeque burgers. Charcoal is made from wood and ignites really easily. I simply place the charcoal in layers with anthracite in a chimney starter and light it up.
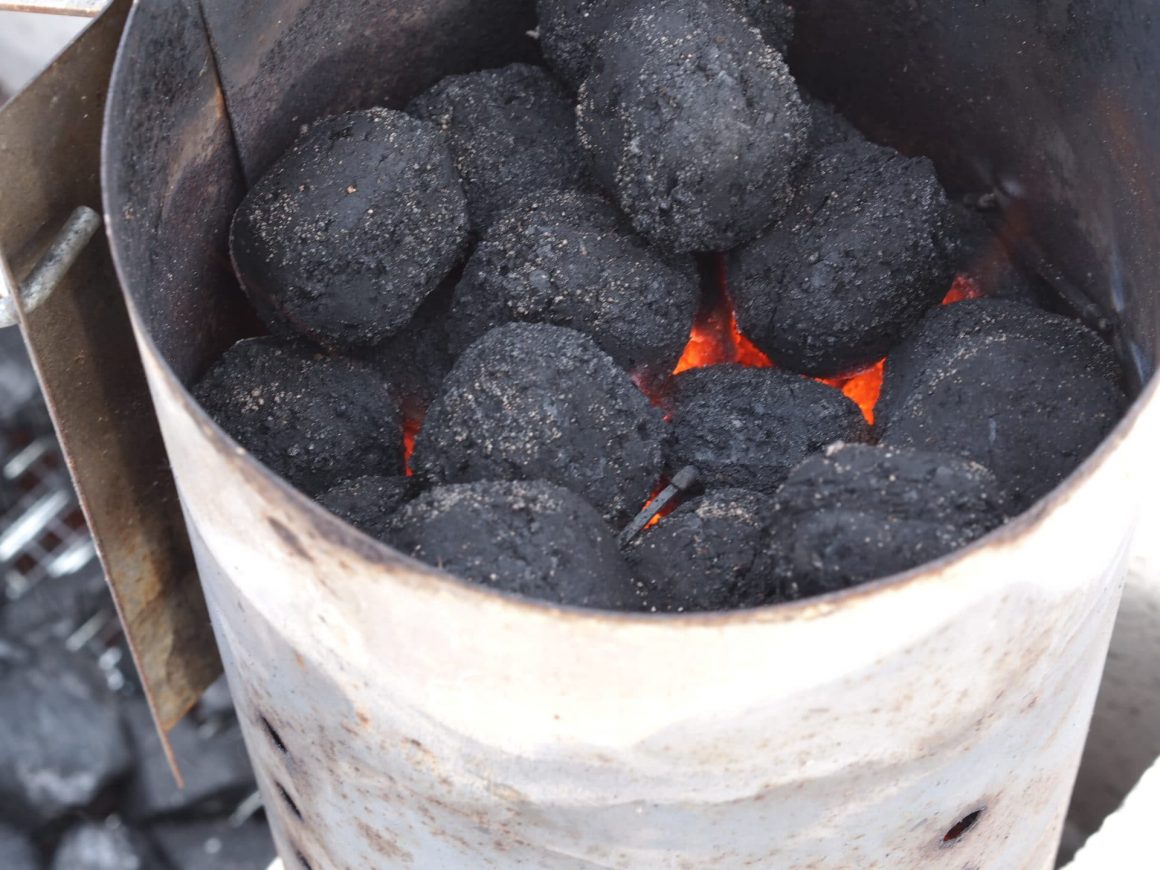
I used about 2 Kg (4 pounds) of charcoal mixed with a 40-pound bag of anthracite. I layer a mix of charcoal and anthracite on the bottom and then add the remainder of the 40-pound bag. This will typically burn for a solid 7 to 10 hours.
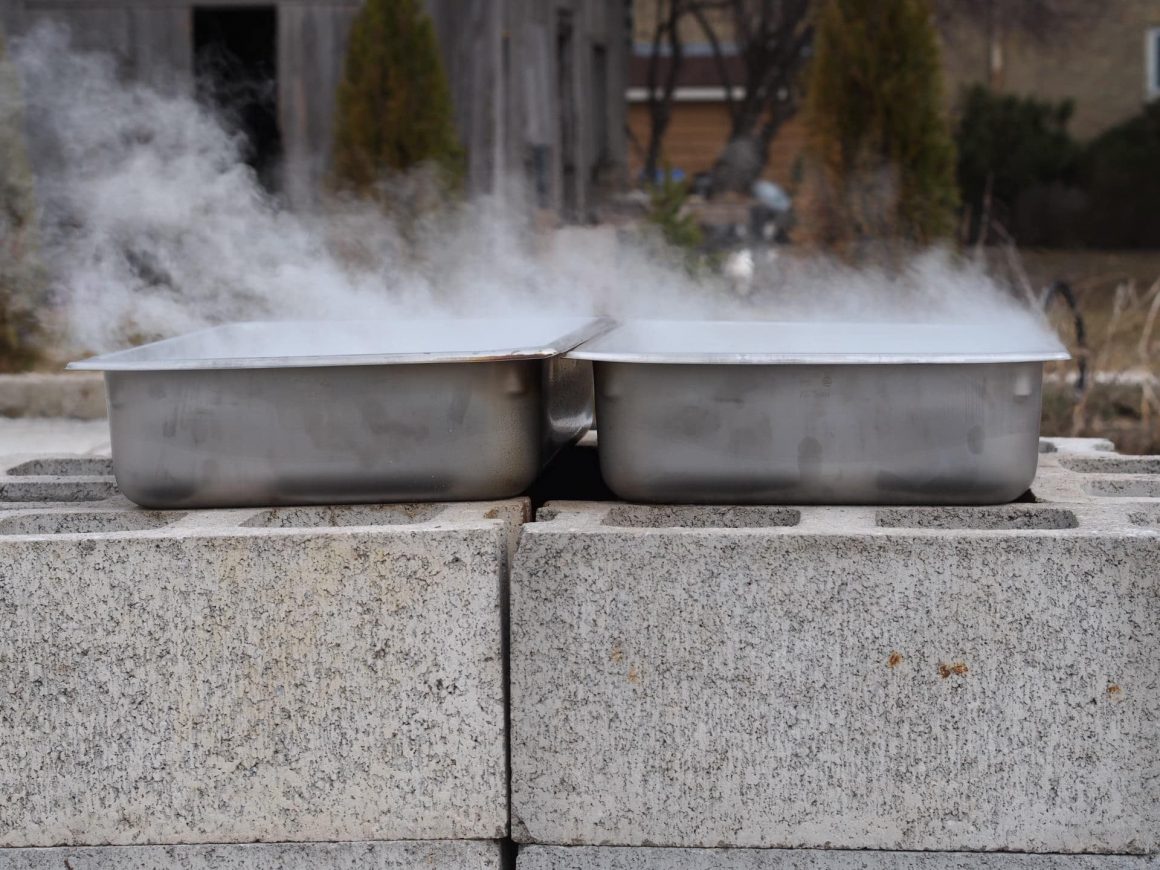
Once the coal is burning at a nice high heat, slide the steam table pans on top and fill them half-full with sap. It will take a bit to get them boiling. As the water boils off, keep adding fresh sap.
I generally check the pans once every hour, but to start, I’d recommend every 30 minutes until you get a feel for how much water is boiling off. Evaporation can vary depending on the outside temperature, humidity and the heat of the fire.
As the water is driven off, the liquid will produce foam and thicken up. Scoop and discard the foam. When you get close to boiling off all the water, take the syrup off the fire, filter the liquid carefully as there will be bits of ash and stuff in the pans, and then do the final boil on a stovetop. You can do this outside, but I find the stovetop gives better control for the last step.
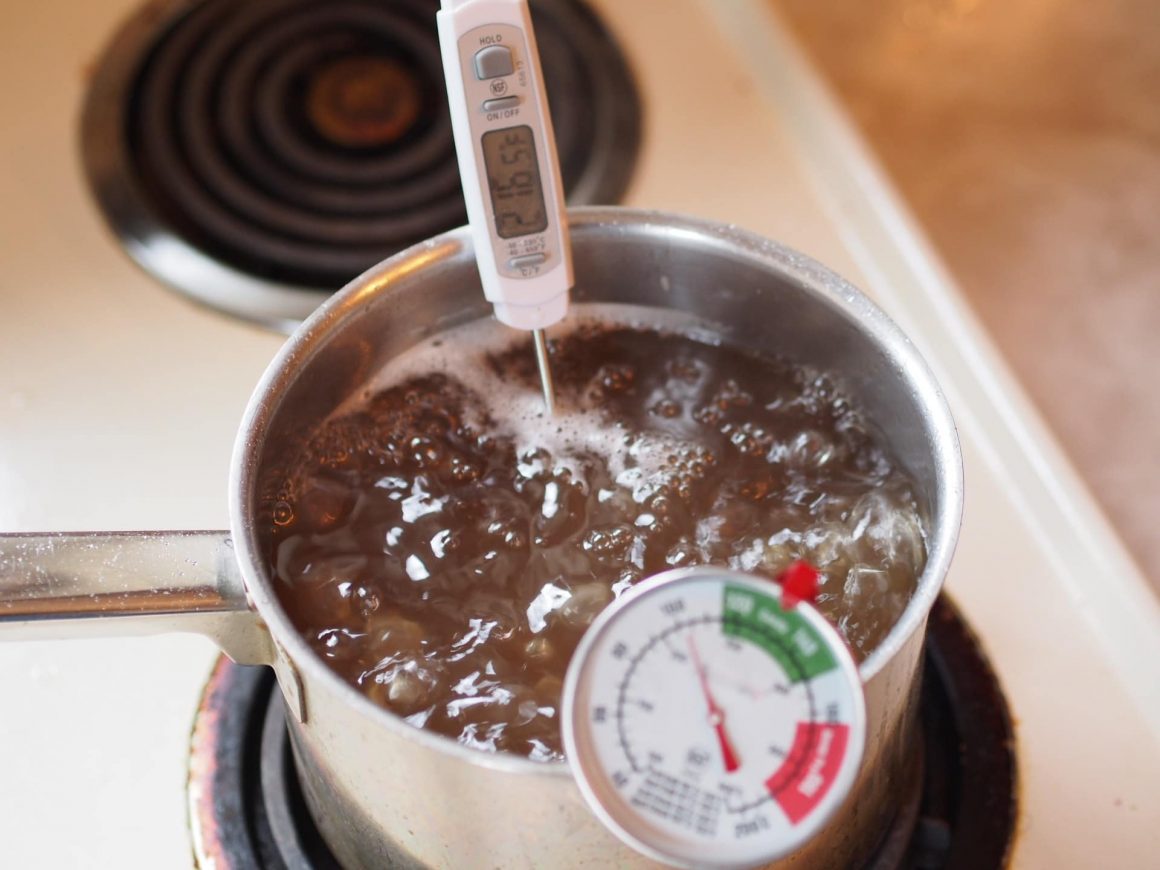
To finish the syrup, simply bring the temperature of the liquid to 104°C or 219°F and hold it there for a minute. Remove it from the heat, allow it to cool for a few minutes and then fill your clean bottles with the hot liquid, which will help sterilize them. Wear rubber gloves as the hot syrup can cause a serious burn.

The bottles I used are recycled Poli Amaro bottles that I’ve kept over the years. I love the narrow neck as it controls the flow of the syrup giving a perfect pour, but any container will do.
Other Tips
- Do not store your tree sap indoors, it could ferment and go sour. It’s best to boil it as soon as possible, but as long as the temperature stays cold, the sap will be fine outside. I kept some sap outside for over 2 weeks in the cold.
- The first sap collected will be very light in colour and have a lighter flavour than later season sap. Mid-season sap is amber in colour and has a stronger maple flavour.
- Once the buds start to form on the trees stop collecting sap as the flavour changes, and not in a good way.
- When you boil the sap it will become cloudy, and you may notice a sediment forming, this is called nitre. Nitre is the natural salts and minerals found in sap and may give your finished syrup a slightly hazy appearance. You can buy a fine filter to polish your syrup and give it that bright look, but that’s probably only important if you are intending to sell the syrup.
- Remember a watched pot never boils, so you don’t need to watch it constantly, just check on it occasionally.
This year wasn’t a great year for sap. The weather was extremely cold through March with short periods of warmth. I had nine taps on six trees which produced about 250L (65 gal) of sap. Nearly 60L (15 gal) is late season sap which isn’t suitable for use on pancakes, but in the past, it was fermented and distilled to make a type of maple rum. That will probably be a post for Art of Drink.

